

Should You Clean Old Tools You Are Going To Sell
If you love tools, y'all've probably experienced the odd, magnetic power that one-time, rusted tools possess. They capture your attending and pull you in. The adjacent thing you lot know, you're scraping away rust with your thumbnail, trying to make out the manufacturer's proper name.
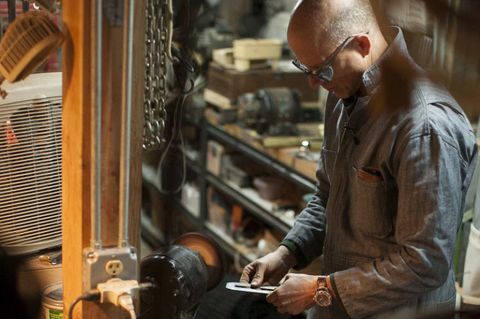
As foggy memories flood back, yous try to recall how exactly you came to own this neglected tool. Perhaps you got information technology at a tag sale or perhaps your father passed it down to y'all. Or, had you borrowed it from a neighbor and forgot to return information technology? "Everybody has them, these picayune hidden jewels," says contributing editor Richard Romanski, a fine woodworker and unrepentant tool collector. "Restoring them is pretty easy."
Nosotros gathered a bunch of forlorn rusted tools and went to work in his studio, a clangorous former church in North Salem, New York. And we discovered that all it takes is some basic chemistry, a little patience, and some elbow grease to restore quondam, rusted tools to similar-new condition. Here's a detailed account of how nosotros removed years of rust from a table saw, some corroded paw tools, and a few dull precision-cut tools.
A rusty, wobbly table saw

A table saw that's kept in an unheated garage, shop, or barn will soon rust. Wet condenses on its steel and cast-iron parts considering they're cooler than the surrounding air. And then it'south only a matter of time earlier you start to see rusting and pitting.
The rust isn't only unsightly, it besides makes it difficult to slide wood across the tabular array, which should be perfectly polish. And rust tin touch adaptable mechanisms, too, making information technology hard to raise and lower the bract or tilt the blade for executing bevel cuts. We plant the circa-1980 Craftsman table saw shown in a higher place at a church auction. Its table was badly rusty and its parts had been thrown out of alignment. But it only price $80 and we knew we could restore it to good working order.
We knew we had to motion the saw to a warm, dry out location, so we unbolted information technology from its rolling stand up, hoisted information technology into a Ford F-150, and drove information technology down the street to Romanski's studio workshop. Next came the tedious disassembly process: We unbolted the cast-iron wings from each side of the saw tabular array and then removed the motor. Tip: Take photos of the saw and label each part prior to disassembly. That'll make it easier to reassemble everything later.
We were pleasantly surprised to detect that the saw had a commercial-duty motor with twin capacitors—ane to start the motor turning and another to provide extra kick to the run winding. The motor'southward shaft and caster were all in expert shape, simply everything was caked in dust and cobwebs. We used compressed air to quickly clear out of the saw's crenel and undercarriage.
Now it was time to remove rust from the saw'due south tabular array and extension wings. We started past wetting the surfaces with kerosene, which acted equally a cut lubricant. After letting kerosene penetrate for about an hour, nosotros vitrify away the rust using a variable-speed drill outfitted with a 2½-inch-diameter nylon loving cup brush that'due south embedded with 240-grit aluminum oxide abrasive. We ran the drill slowly at around 500 rpm, and motion it back and forth across the surface for several minutes. The cup brush removed the rust without marring the surface. Nosotros then mounted the wings back onto the saw and aligned them affluent with the saw table by carefully tapping them with a expressionless-blow mallet.
Later on placing a new 10-inch carbide-tipped saw blade on the arbor, Romanski used a machinist's square to ensure the blade was perfectly perpendicular to the tabular array. With the blade at xc degrees, the arrow indicator on the saw's tilt calibration should read 0 degrees; if it doesn't, motion the pointer to the zilch mark. Next, we adjusted the sliding fence and its locking mechanism to ensure it locked securely and was perfectly parallel with the bract.
The tune-up was completed when Romanski reinstalled the motor and used a long steel ruler to marshal the motor pulley with the pulley on the saw's arbor shaft. That'south an of import step considering if the pulleys aren't aligned, excessive vibration will prematurely wear out belts and bearings. Nosotros and then buffed paste wax onto the restored metal surfaces to assist deter future rusting, bolted the saw back onto its stand, and made several test cuts. The saw ran smoothly, cut effortlessly, and looked great!
Corroded hand tools
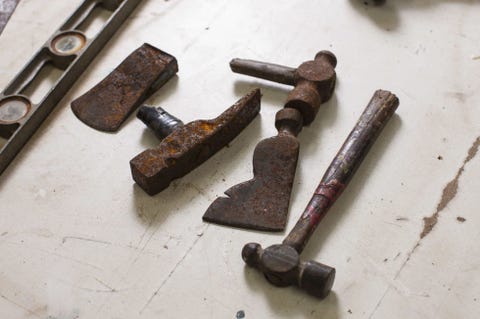
Rusty mitt tools seem to turn upwardly everywhere: in sheds, basements and garages; in old, forgotten toolboxes; in car trunks; and, of course, at tag sales all across the country. Often the original wooden handles are cracked, rotted, or missing altogether. And the steel heads are so badly rusted you lot could get tetanus by just looking at them.
To restore a pile of ball-peen-hammer and a couple of hatchets, we first had to remove what was left of their handles. We used a handsaw to cut the handle stubs flush with the tool heads, then we clamped each caput in a vise and used a hammer and dial to knock out the terminal flake of the handle.

To deliquesce years of corrosion, we submerged the heads in a bucket containing a gallon of white vinegar. We covered the saucepan with a slice of plywood and permit the parts soak for nearly iv hours. Next, we scrubbed off the surface rust with Grade 1 steel wool. Information technology didn't remove all the rust, but in that location was a noticeable difference. Dorsum into the vinegar the tool heads went, and this fourth dimension nosotros allow them soak overnight. Next, we buffed them once again with steel wool, and all the rust came off. We rinsed the tools thoroughly in clear water to remove any terminal trace of vinegar and wiped them dry.
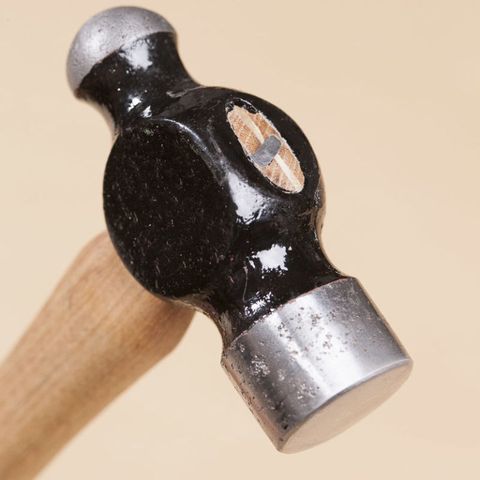
Some of the tool heads were severely pitted, so we smoothed them with a disc sander fitted with a 100-grit abrasive disc sander. On a couple of the ball-peen hammers, the metal effectually the head'south hit surface had been peened over by repeated hammer blows. To repair the damage, we clamped each hammer caput in a vise and and then hand-file the surface smoothen.
Finally, the tools were wiped make clean with mineral spirits, primed with a rust-preventive metal primer (we used spray-on Rust-Oleum), and painted with gloss alkyd enamel. The cutting edges on the hatchets were hand-honed on a serial of water stones used for woodworking tools. We completed each tool past fitting a hickory handle through the cavity in the head.
Equipment You Might Want to Get Rust Off
")


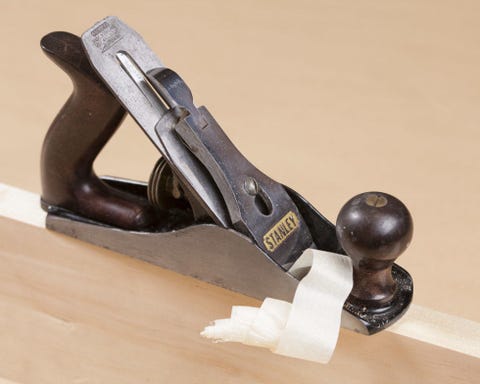
Irksome precision tools

The first stride in restoring precision tools is to carefully disassemble the tool, separating the corroded parts from the clean ones. In the example of the smoothing plane shown here, the trunk wasn't as desperately corroded every bit it first looked. We removed most of the rust with a wire brush. And then nosotros lapped the sole of the plane on a succession of abrasive papers, start with very fibroid lx-grit and proceeding through to super-fine 1,000-grit.
We taped the sandpaper to a workbench that had a perfectly flat surface and slid the airplane trunk over the newspaper, swapping it end for finish afterward every half dozen or 8 passes. We used a few drops of odorless mineral spirits as our cut lubricant. The body came out flat and smoothen, with no rust and just very minor pitting.
Next, we sharpened the plane fe on a horizontal wet sharpening bicycle and even honed its back surface then that it was flat several inches backside the cutting edge. This ensures that the chip breaker will snug up tightly confronting the fe, and so no wood shavings can be trapped and torn off.
Later sharpening, we took the lever cap and the plane iron'southward fleck billow and buffed them out on a muslin buffing wheel with jewelers red rouge polishing compound.
Romanski has more than forty years of woodworking experience, then he did the final inspection of the aeroplane iron. He followed the car honing with a careful trip over his h2o stones, leaving the plane iron with a mirror finish. He assembled and adjusted the rescued plane and took it for a test flying across a piece of clear pine. The result was a tool that cutting perfectly, taking long, silky-smooth shavings with every pass.
This content is created and maintained by a third political party, and imported onto this page to help users provide their e-mail addresses. You may be able to observe more than data about this and similar content at piano.io

Source: https://www.popularmechanics.com/home/tools/how-to/a14313/how-to-restore-rusted-old-hand-tools/
Posted by: myersreplach.blogspot.com
0 Response to "Should You Clean Old Tools You Are Going To Sell"
Post a Comment